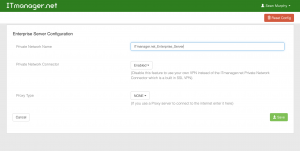
- With ITmanager.net Enterprise Server running go to Start Menu/All Programs/ITmanager.net
- Select the ITmanager.net icon to open
- Once the browser opens with ITmanager.net running, highlight the field “Private Network Name”, RENAME it and select Save
- From mobile app or web app go back to your Services/Connection configurations and in the last field “Private Network” from the drop down list choose the updated named server. You will have to do this for each of your Services/Connections.


Note: When renaming your ITmanager.net Enterprise Server be sure there are no spaces in the name.
Note: In the web app to remove the old/off-line connector click on the “Trash Bin”. For more detailed instructions click here.
Still have questions?
Send us an email: support@itmanager.net